A hobbit-hole in my backyard? It may sound crazy, but I can tell you that my kids love it. It is the coolest playhouse ever. Plus, they can enjoy the grassy hill for sledding in winter and water sliding in summer. This was all my wife's idea. She dreamt it, and I got to be the one to bring it to reality. I'm not a construction expert; this was a total do-it-yourself job by a complete amateur. It has turned out rather nicely, I think. Here is the story of how it came to be.

Since this is in blog format, the posts are in order from newest to oldest. To read this in chronological order, start with How it all Began and use the "Newer Post" links. Or click on the links under Blog Archive, in order.

Sunday, June 22, 2008

The Door Takes Shape (Round, of Course)

I am finally getting to the most characteristic part of the hobbit-hole (aside from being under ground): the round door. Actually, truth be told, it is not going to be a fully round door. To make the door a complete circle would be an engineering feat. It is possible, but it would require that I spend a lot more money on a very large, specialized hinge. I decided to go a simpler route, and make a mostly round door, in sort of a "D" shape, but finish it out round to create the illusion of a full circle.

Above, you can see the same, where the hinges are located. Below, you can see how it opens inward. Once I paint it green, and put in some weatherstripping (also painted green), in the seem, it will look pretty seamless, like a fully round door when closed.


The next step is to frame in the left side and install a ball latch, so the door will shut and stay shut. Then I will prime it, paint it, and put on a brass doorknob in the middle. Then I will build out from there to create a door jamb, and a recessed look to the door.
With this much of the door completed, the kids excitement about the project more than doubled. The door, I guess, even unfinished, makes it seem that much more real to them. Since I built this, they have slept out in the hobbit-hole in their sleeping bags 5 times (in less than 2 weeks).

Monday, June 2, 2008

Looking Good, But Far From Finished

At this point, I am starting to feel a little bit like Frodo, or rather Sam did, at the Last Homely House in Rivendell. He thought that after their long journey to bring the ring to Lord Elrond's house, their part in the quest was done, and they could go home. Little did he know that their adventure had just begun. This is really starting to look like a hobbit-hole, but I'm afraid I'm not even half-way finished with it yet. My goal is to get this to look good enough to be mistaken for a real hobbit-hole in the shire.
What's new since my last post? I finished the flashing on the roof, and went ahead and put some dirt up there, just to get a little bit of a sense of what is to come. Ultimately, of course, all that dirt around will be up on top of the pipe, completely hiding it. The hill will come right down onto the roof, and there will be grass growing all over it.

Other changes include shingles down the sides. These sides will be mostly covered with dirt. They needed to be waterproof as well, but also the parts that stick out from the hillside needed to look nice. I hope this will do the trick.

I started building out the patio, using chunks from an old concrete slab that my brother-in-law tore up from his yard. These things weigh a ton, and he and I carted about fify of them to my place in a tiny pickup truck with a rickety wood trailer. (I'm surprised the truck and trailer axles didn't break.) They have been piled up on my back patio for over a year and now I finally have a use for at least some of them. I'm going to build the patio out several feet, and also extended it a little to the right. The cracks will be filled with topsoil, and eventually ground cover (moss or something). I bought this tiny, hobbit-sized park bench, which will sit right where you see it, but with the patio under it.

So what's left? Tons. Stay tuned.

Hobbit-Sized Roof

The entry way needed a little roof over it, both for practical and aesthetic reasons. The challenge was to get the roof to look rounded, when it actually consists of straight angles.

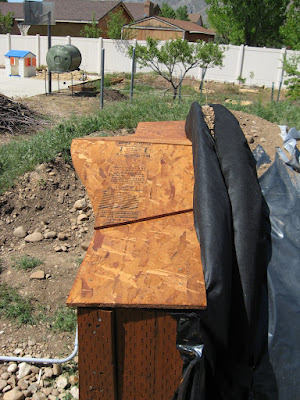
I cut the two middle pieces so that they would jut out further than the sides, and gave them a curved line using the jigsaw.
Here is a top angle view. You cans see the rounded look to the roof line. You can also see more of my cludge waterproofing/drainage work here. The wood piece abutting the pipe is wrapped in black plastic and landscaping fabric, and behind it, laying on the edge of the pipe, is more drainage pipe, wrapped in landscape fabric, to help take water away from this seam. It may have invented my own method, but I know it works, because I ran a hose all over this full blast for 15 minutes, and there are no leaks underneath. Here is another angle on it. It is starting to look more and more hobbit-like.
This turned out to be the only shot I took of the shingled roof before I mostly buried it with dirt (see next post). You can see the flashing and the shingles. With the shingles on there, it really gives it more of a rounded look. I later put more flashing along the seam between the roof and the veritcal piece, and took the flashing up and over the lip (top) of that verticle piece. Later, I will paint the flashing with some earthtonee, so it doesn't stand out so much, shining in the sun.

This Hobbit-hole is Wired

Bilbo and Frodo had their adventures long before electricity was invented. However, since oil lamps and candles are a fire hazard for children, I decided I had better use electric lighting instead. So I ran grey conduit pipe and pulled 12/2 UF Burial Wire through it. (Yep, it was hard to pull it through, especially with turns like this in the pipe. And, yes, I know it is redundant to run wire that is already rated for outdoors (above or below ground) through grey conduit. But I figured that I might as well make it extra safe.) The wire is not yet live, and since this picture was taken, I dug a deep trench to bury it. Finishing the wiring inside will be a later task. I plan to put in four light fixtures (extra-cool, old-fashioned, hobbit-looking ones) and one GFCI outlet (with a nifty, antique-looking faceplate).
Custom Search